How to call methods of a WPF application from a Python script
Approximately ten years ago, I had to write a plugin for a CAD system. The challenge was that, according to the business requirements, I had to develop it using C# and WPF. At the same time, the CAD system’s scripting functionality supported only Python and a few other languages. I’m sure you`ve already guessed that C# wasn’t on that list. So I had to find a way to call WPF methods from Python scripts. I recalled this case a few days ago and decided to check how this task could be done today.
First of all, you might be wondering why I had to provide the ability to call individual methods. I could have just created a Python wrapper inside the CAD system and started a separate process that launches the entire WPF app from there, couldn’t I? Yes, I could. But according to the previously mentioned business requirements, I had to implement a dropdown menu through the CAD system’s scripting functionality, - meaning through Python. So each dropdown menu element (e.g. Authorize, About, etc.) called a distinct C# method.
Initially, I installed UnmanagedExports by Robert Giesecke. It’s a pretty interesting and useful NuGet package that allows you to export methods from .NET assemblies as native DLL functions by adding specific DllExport attributes to the required methods. For example, here’s how the About window opening method and its attribute looked: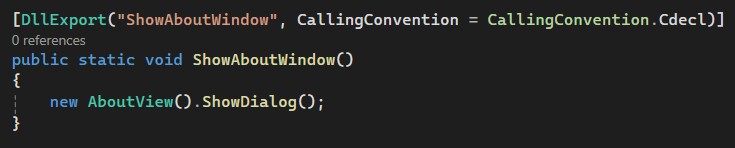
Example of a DllExport attribute
At the same time, using the DllExport attribute imposed certain restrictions on the C# method. The method had to be static, and the CallingConvention had to be set explicitly. A calling convention defines how parameters are passed to a function and who is responsible for cleaning up the stack after the call. It supports two values: Cdecl (the stack is cleaned by the caller) and StdCall (stack is cleaned by the callee). Also, the project type had to be configured as a class library and the .NET Framework had to be installed on the user`s machine.
To call these methods from a Python script, I imported ctypes, and declared the DLL as a separate variable there:
![]()
Separate varibale for the DLL
Once the DLL is declared, I can call its methods from the script. Here is an example of how to show the About window of the WPF app:
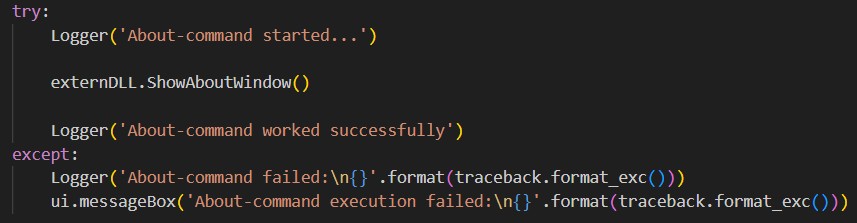
Showing the About window
This approach was acceptable in the mid-2010s, and technically, it still works for the .NET Framework. Hovewer, I can’t recommend it nowadays for several reasons. The first one is that the UnmanagedExports NuGet package is no longer supported - it hasn’t been updated in more than ten years. Using software, that has been unsupported for so long is a bad idea in itself, but in our particular case it also means that the package doesn`t support .NET Core or .NET 6+. There are no known security vulnerabilities in this package, but if any appear, they won`t be fixed. The second reason is that there is nowadays an easier approach that I am going to show you. Allow me to introduce PythonNET (Python for .NET). It is a library that allows Python code to interact with .NET ecosystem. It serves as a bridge between Python and the .NET runtime.
First of all you have to install PythonNET via PowerShell:
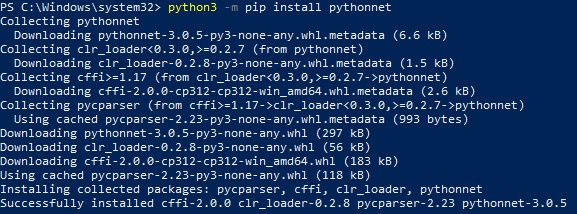
Installation of PythonNET
Also, you can check its version if you already have PythonNET installed and update it if necessary:
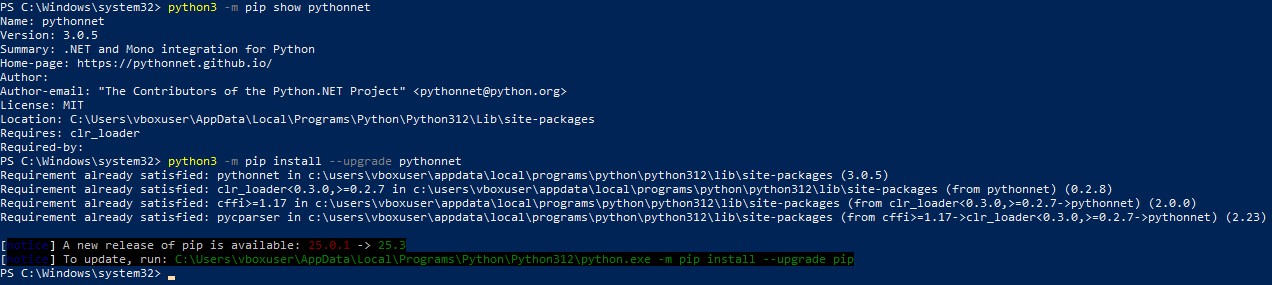
Checking and updating installed PythonNET version
Once you’ve made sure that the required version of PythonNET is installed, you need to create a WPF application (if you don`t already have one). For example, something like this:
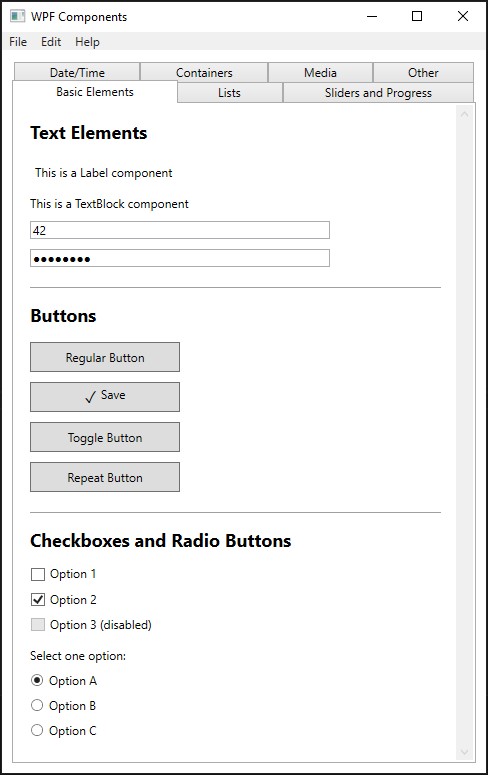
Example of a WPF application
This UI was created using standard XAML markup, familiar to anyone who works with WPF:

XAML markup for the UI
The real fun starts after that. To run this app from a Python script, you need to create a wrapper class for the entry point. Let’s call it MyWpfAppWrapper and add a few fields to it:
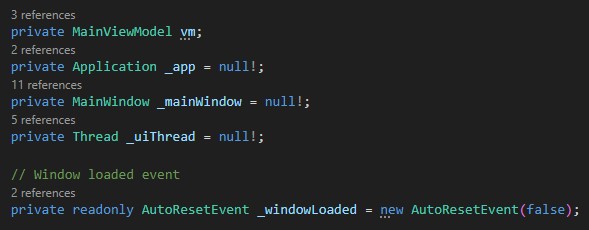
Fields of the MyWpfAppWrapper class
All of the fields are pretty straightforward, except for the _windowLoaded AutoResetEvent object. AutoResetEvent type is used for thread synchronization and can be in either a signaled or non-signaled state. If the event is non-signaled, any thread that calls WaitOne will be blocked until the event becomes signaled. The Set method, on the other hand, switches the event to the signaled state. The next part of the class we need to look at is the constructor. It simply creates the view model for our UI view and calls the InitializeApplication method, which is the heart of the class:
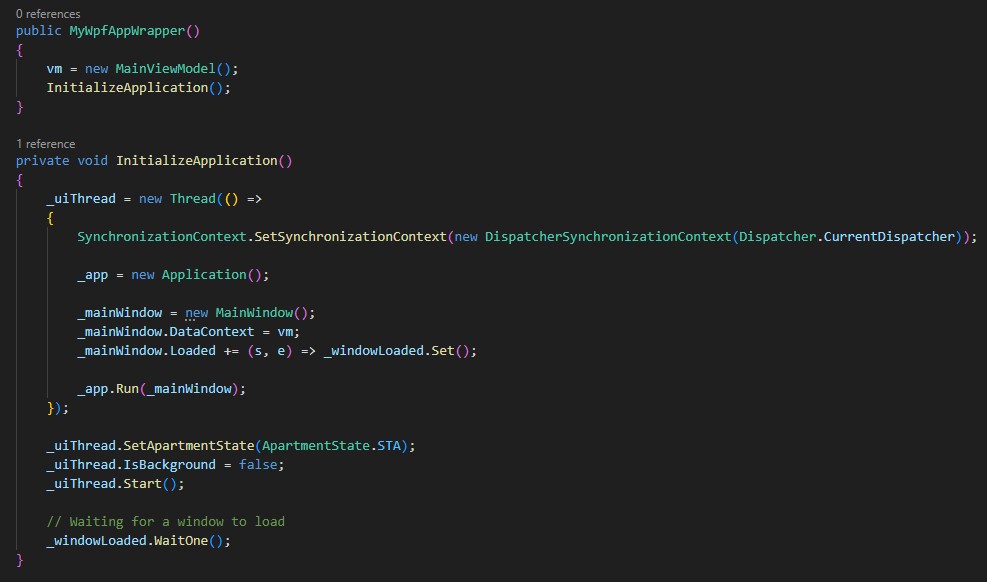
The constructor and the InitializeApplication method
So what is this method about, and why do we need a separate thread? We need it because Python will call the app from its own thread. At the same time, the WPF UI must run in a dedicated STA thread. Therefore, we create a separate thread specifically for WPF. What happens inside the thread:
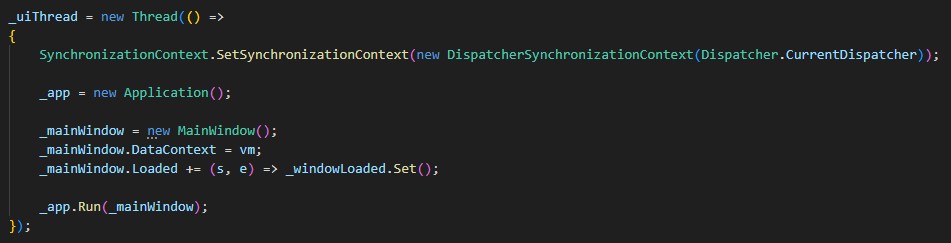
UI thread body
The first line creates and sets a DispatcherSynchronizationContext for the current thread, ensuring that all UI operations are executed on the correct thread. After that, we create a new application instance, create an instance of the main window, and set the view model as its data context. This logic should be clear to any WPF developer. _windowLoaded.Set(); handler is much more interesting. After the window loads, we call _windowLoaded.Set(), which puts the AutoResetEvent into a signaled state, allowing the waiting thread (the main thread) to pass through WaitOne() and continue execution. The event then automatically resets to non-signaled. And the final line starts the app with the main window. And let’s take a look at the rest of the method:

Rest of the method
First of all, we set the apartment state to STA. WPF is based on DirectX and the Win32 API, both of which use COM. Many WPF UI components are COM objects, and therefore can operate only in STA mode. STA (Single-Threaded Apartment) is a threading model for COM objects where an object is bound to a single thread and all calls to it are marshaled through that thread`s message queue. The next line sets the IsBackground property to false. Because of this, the Python script will wait until the user closes the WPF window. Then we start the UI thread and, set the _windowLoaded AutoResetEvent to the non-signaled state, which means we will wait until the window is loaded.
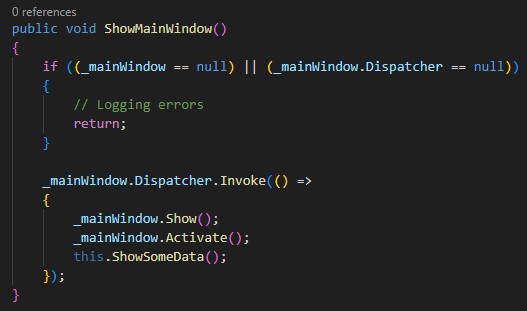
The ShowMainWindow method
Let’s move on. Aside from the InitializeApplication method, there is also a ShowMainWindow method in the MyWpfAppWrapper class. First of all, it checks whether the main window or its dispatcher is null. If so, we should just return. Otherwise, we simply show the window, activate it, and call a business logic method. Note that this functionality belongs to the UI, so it must be called via the Dispatcher.
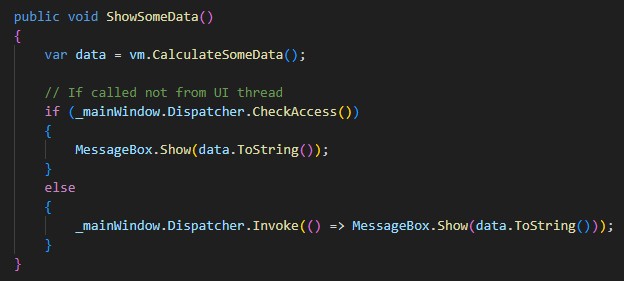
The ShowSomeData method
Business logic is introduced in the MyWpfAppWrapper class as a method that requests some data from the view model and displays this data in a MessageBox. Keep in mind that it must be called via the Dispatcher because this code interacts with UI components.
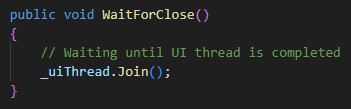
The WaitForClose method
And last but not least, the WaitForClose method is used to wait until the UI thread closes. And that’s it - you don’t need any additional C# code to run a .NET app from a Python script. But what should this script look like? It should consist of a few parts: a setup section and the function to call. Let’s take a look at the setup section:

Setup section of the script
In the first two lines, we import modules for interacting with the operating system and for calling C libraries. The next few lines get more interesting. Here we explicitly load the wpfgfx_cor3.dll library. It is required for rendering WPF graphics. Without this step, you may get exception similar to the following one:

wpfgfx_cor3.dll not found exception
The next line ("from pythonnet import load") is required to import the load function from the PythonNET library. To make it work, you need to install the PythonNET library via pip (just run "pip install pythonnet" in PowerShell). Importing the load function allows you to tell PythonNET to use the CoreCLR runtime. CoreCLR is the runtime for .NET Core and .NET 5+ versions of the .NET platform. If you use the .NET Framework or the Mono runtime, you need to set the "netfx" or "mono" parameters for the load function accordingly. Only now, when CoreCLR is selected as the .NET runtime, we can import clr into our Python script. Otherwise, an error may be thrown, or the wrong runtime version can be selected. Now let’s take a look at the function itself:
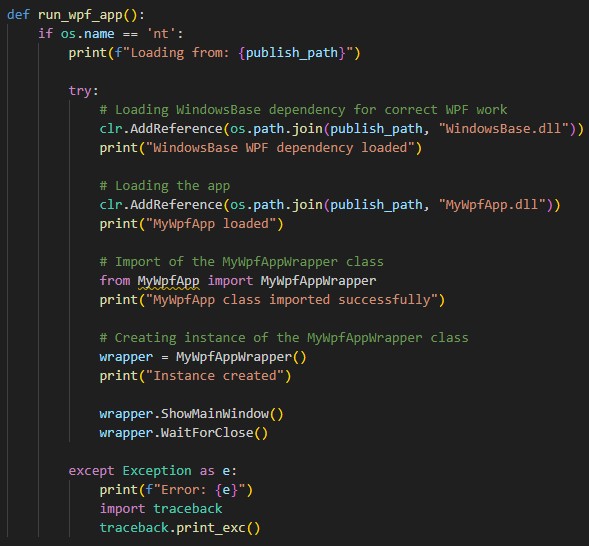
The run_wpf_app function
First of all, we check if the operating system is Windows. If so, we explicitly load the WindowsBase.dll, a core WPF infrastructure library that contains fundamental types and functionality required for Windows Presentation Foundation to work correctly when called from PythonNET. After that, we need to load the DLL that contains our app. Once it is loaded, we import the MyWpfAppWrapper class from the MyWpfApp module and create an instance of it. Now we have the ability to call its methods via their native signatures. It is also very important to call the WaitForClose method after all other UI methods. Otherwise, the app may be closed right after launch. The rest of the method is just an exception handler. The final part of the script is just a call to the run_wpf_app function:
![]()
Call to the run_wpf_app function
And here is what the user sees when the app is launched:
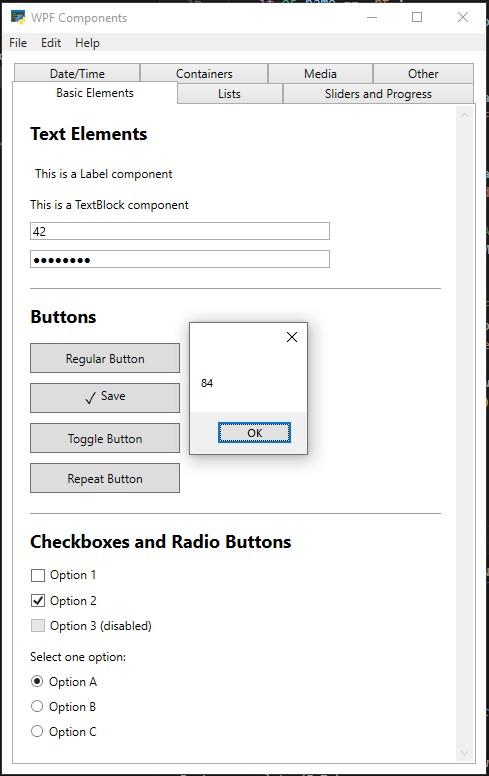
The WPF application
The user sees the message box because the ShowSomeData method displays it using data calculated in business logic of the view model. All the richness of WPF functionality is now available in the app, but you can also call methods directly if they are exposed by the MyWpfAppWrapper class.
Thanks for reading, I hope you found this useful.